A DIY cookie kit is a delightful way to merge creativity with indulgence, offering pre-baked cookies, royal icing, and decorations for a fun, customizable treat.
What is a DIY Cookie Kit?
A DIY cookie kit is a convenient and creative bundle designed for cookie decorating enthusiasts. It typically includes pre-baked cookies, royal icing or buttercream frosting, sprinkles, and detailed instructions. These kits allow users to decorate cookies at home with minimal preparation. They are perfect for gifts, parties, or family activities, offering a fun and customizable treat. Some kits also include themed decorations or seasonal designs, making them ideal for holidays or special occasions. The goal of a DIY cookie kit is to provide everything needed for a delightful and memorable decorating experience, ensuring both kids and adults can enjoy the process.
Why Create a DIY Cookie Kit?
Creating a DIY cookie kit offers numerous benefits, making it a popular choice for various occasions. It allows for personalization, enabling users to tailor the kit to specific themes or events. This makes it an ideal gift or activity for parties, holidays, and family gatherings. Additionally, DIY kits promote creativity and engagement, providing a fun and interactive experience for both children and adults. They also save time, as they often include pre-baked cookies and prepared frosting, reducing the need for extensive preparation. Furthermore, DIY cookie kits can be easily customized to suit different skill levels, from beginners to experienced decorators, ensuring everyone can enjoy the process. This versatility and convenience make DIY cookie kits a delightful and memorable experience for all involved.
Popular Occasions for DIY Cookie Kits
DIY cookie kits are perfect for a variety of occasions, making them a versatile and thoughtful gift or activity. They are ideal for holidays like Christmas, Easter, and Halloween, where themed cookies add to the festive spirit. Birthday parties, baby showers, and weddings also benefit from these kits, offering a fun and interactive treat for guests. Additionally, they are great for family gatherings, school events, or even as a cozy activity for a movie night. Their adaptability to different themes and occasions makes them a popular choice for celebrating milestones or simply enjoying quality time with loved ones. DIY cookie kits bring creativity and joy to any event, ensuring a memorable experience for all participants.
Essential Components of a DIY Cookie Kit
A DIY cookie kit typically includes pre-baked cookies, royal icing or buttercream, decorations like sprinkles, and detailed instructions for decorating. Packaging ensures freshness and convenience.
Ingredients and Supplies Needed
To create a DIY cookie kit, you’ll need pre-baked sugar cookies, royal icing or buttercream frosting, and a variety of decorations like sprinkles, edible glitters, and small candies. Additionally, include piping bags, icing tips, and a set of instructions for decorating. For packaging, use clear treat bags or airtight containers to keep the cookies fresh. Optional supplies include themed decorations, brushes for detailed work, and flavor extracts for the icing. Ensure all items are stored properly to maintain freshness and convenience. These components provide everything needed for a fun and creative cookie-decorating experience. A well-organized kit guarantees success and enjoyment for both kids and adults, making it a perfect gift or activity.
Types of Cookies for DIY Kits
The most popular cookie types for DIY kits are sugar cookies, gingerbread cookies, and shortbread cookies. Sugar cookies are ideal due to their soft texture and ability to hold decorations well. Gingerbread cookies are perfect for seasonal themes, like holidays, and offer a spicy flavor. Shortbread cookies are buttery and durable, making them great for decorating. Additionally, snickerdoodles and sandwich cookies can be included for variety. These cookie types are chosen for their durability and ease of decoration, ensuring they remain fresh and visually appealing in the kit. Including a mix of shapes and flavors adds excitement and creativity, making the DIY kit more enjoyable and versatile for all occasions.
Royal Icing vs. Buttercream Frosting
Royal icing and buttercream frosting are two popular options for decorating cookies in DIY kits. Royal icing dries hard, making it ideal for intricate designs and long-lasting decorations. It is often preferred for its smooth, pipable consistency and quick-setting properties. Buttercream frosting, on the other hand, is sweeter and creamier, offering a softer texture and more flavor variety. While royal icing is better for detailed work and shipping, buttercream is perfect for immediate use and taste preferences. Both can be customized with colors and flavors, but royal icing is more durable and suitable for pre-made kits. The choice depends on the desired outcome and user preference, with royal icing being the go-to for professional-grade results.
Decorations and Sprinkles
Decorations and sprinkles are essential for adding personality to DIY cookie kits. They provide endless creativity, allowing users to customize their cookies with themes, colors, and textures. Popular options include sprinkles, nonpareils, sanding sugar, and edible glitter. Themed kits often feature decorations like holiday-themed sprinkles or shaped candies to match occasions. Including a variety of decorations encourages creativity and makes the DIY experience more enjoyable. When selecting decorations, consider the kit’s theme and the recipient’s preferences. Sprinkles are a favorite for their vibrant colors and versatility. Proper packaging ensures decorations stay fresh and organized. Adding a small selection of decorations enhances the DIY cookie kit, making it a memorable and fun activity for all ages.

Step-by-Step Instructions for Preparing the Kit
Bake cookies, prepare royal icing, and package everything neatly. Include decorations and instructions for a complete DIY experience. Ensure all components are fresh and ready to use.
Baking the Perfect Cookies
To bake the perfect cookies for your DIY kit, preheat your oven to 375°F (190°C). Roll out dough on a floured surface to 1/4 inch thickness and cut into desired shapes. Place cookies on parchment-lined baking sheets, leaving 1 inch of space between them. Bake for 8-10 minutes until edges are lightly golden. Allow cookies to cool on the baking sheet for 5 minutes before transferring to a wire rack to cool completely. For gingerbread cookies, bake at 350°F (175°C) for 10-12 minutes. Ensure cookies are firm to the touch but not overbaked. Let them cool fully before frosting or packaging. This step ensures your cookies are sturdy and ready for decoration. Proper baking is key to a successful DIY cookie kit experience.
Preparing Royal Icing
To prepare royal icing for your DIY cookie kit, combine 1 cup (200g) of powdered sugar, 2 tablespoons of meringue powder, and 2-3 tablespoons of water in a bowl. Mix until smooth and free of lumps. Add a few drops of almond extract for flavor. Divide the icing into separate containers for coloring. Use food-grade dyes to create desired hues, mixing well to ensure even color distribution. If the icing is too thick, add a little water; if too thin, add more powdered sugar. Transfer the icing to piping bags fitted with small tips for detailed decorating. Store any unused icing in an airtight container at room temperature for up to 3 days. Properly prepared royal icing is essential for achieving professional-looking cookie decorations.
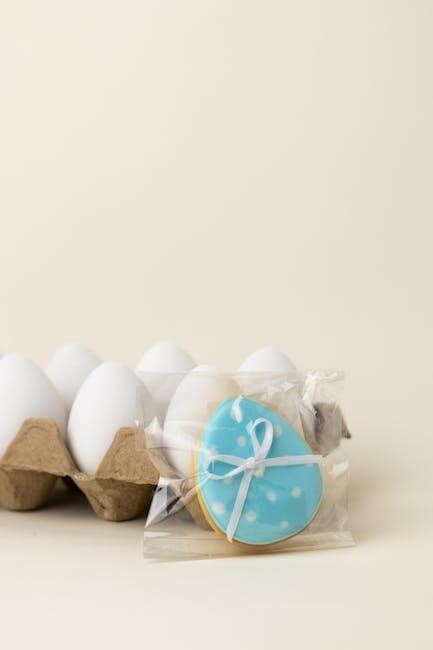
Packaging the Cookies and Frosting
Packaging is a crucial step in creating a DIY cookie kit. Place the baked cookies in a 4×9 clear treat bag to ensure visibility and freshness. Secure the top with a twist tie or ribbon. For the frosting, transfer it into airtight containers or piping bags. Include a small instruction card with decorating tips. Add sprinkles or decorations in separate small containers. Arrange all items neatly in a gift box or paper bag. Ensure the packaging is visually appealing and includes all necessary components. This step ensures the kit is both functional and visually attractive, making it perfect for gifting or sharing.
Decorating Techniques for Your Cookie Kit
Master basic icing techniques like piping borders and flooding. Experiment with advanced designs, layering colors, and adding intricate details. Use sprinkles, edible gems, or fine tips for finishing touches.
Basic Icing Techniques
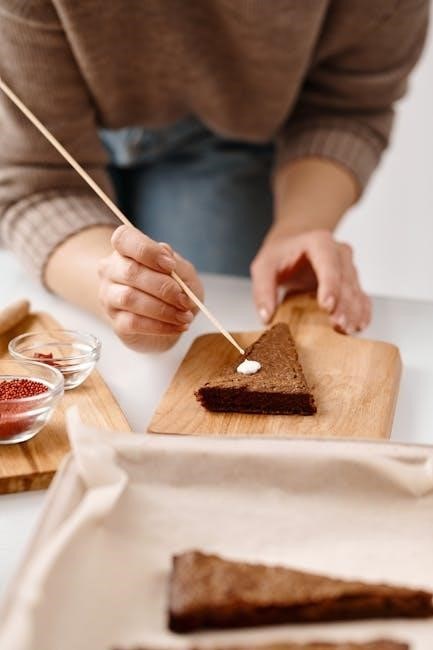
Start by kneading the icing bag gently to mix the icing, as separation is normal. Cut a small hole at the tip of the piping bag using scissors. Apply even pressure to pipe borders, outlines, or fill large areas. For details, use a fine-tip piping bag or a toothpick to create intricate designs. Practice basic strokes like lines, dots, and swirls to build your skills. Begin with simple techniques, such as outlining the cookie edges or flooding the surface with icing. Add sprinkles or decorations before the icing hardens for a polished look. These foundational methods are perfect for beginners and ensure a smooth start to cookie decorating.
Advanced Decorating Ideas
Take your cookie decorating to the next level with advanced techniques like layering, 3D effects, and intricate designs. Start by creating textured backgrounds using layered icing or stamping patterns with everyday tools. Use a toothpick or small knife to craft fine details, such as facial features or intricate borders. Experiment with multi-color layering by allowing the first layer of icing to set before adding additional designs. For 3D effects, pipe icing in thick layers and shape it before it hardens. Consider combining edible decorations, like tiny candies or sprinkles, for added dimension. Lastly, try creating gradient effects by blending icing colors on the cookie surface. These techniques will elevate your DIY cookie kit creations into stunning, professional-looking treats.
Storage and Handling Tips
Store DIY cookie kits at room temperature in airtight containers to maintain freshness. Avoid refrigeration to prevent icing separation and ensure cookies stay soft and ready for decorating.
How to Store the Cookie Kit
To maintain freshness, store the DIY cookie kit in an airtight container at room temperature. Keep cookies separate from icing to prevent moisture absorption. Avoid refrigeration, as it may cause icing separation. If not using immediately, freeze the cookies for up to 3 months and thaw at room temperature when ready. Ensure all components are sealed tightly to preserve quality. For optimal results, use the kit within 1-2 weeks of preparation or purchase. Always allow chilled items to reach room temperature before decorating for the best experience. Proper storage ensures your DIY cookie kit remains fresh and ready for creative fun whenever you are!
Shelf Life and Freshness
The shelf life of a DIY cookie kit depends on proper storage and handling. Cookies remain fresh for up to 1-2 weeks when stored in an airtight container at room temperature. Royal icing, if kept sealed and refrigerated, can last up to 3 days, while buttercream frosting typically has a shorter shelf life of 1-2 days. Freezing cookies for up to 3 months is an excellent way to preserve them, ensuring they retain their flavor and texture. Always thaw frozen cookies at room temperature before decorating. For optimal freshness, use the kit within the recommended timeframe to enjoy the best taste and decorating experience. Proper care ensures your DIY cookie kit stays fresh and delightful for a longer period.
Customization Ideas
DIY cookie kits can be tailored to fit any theme or occasion, offering endless creative possibilities for both beginners and experienced decorators. Elevate your kits with unique designs, seasonal themes, and personalized touches to make them truly special and memorable.
Themed Cookie Kits
Themed cookie kits allow for endless creativity, making them perfect for special occasions or holidays. For Halloween, include spooky-shaped cookies and orange frosting. Christmas kits might feature snowflake cookies with red and green icing. Valentine’s Day kits can have heart-shaped cookies and pink sprinkles. Even themed kits for movies or sports events can be created, tailoring colors and decorations to match the theme. Kids love themed kits, especially when they include fun shapes like animals or superheroes. To enhance the experience, add themed decorations such as tiny edible images or custom sprinkles. Themed kits make great gifts and can be designed to suit any celebration or interest.
Personalizing the Kit
Personalizing a DIY cookie kit adds a special touch, making it a unique gift or activity. Start by customizing the packaging with the recipient’s name or a heartfelt message. Include themed decorations or sprinkles that match their favorite colors or interests. For a personal flair, add a handwritten note or a small photo. You can also tailor the cookie shapes and icing flavors to suit their preferences. Consider offering customizable icing colors or additional toppings like edible glitter or chocolate chips. For a professional look, use branded labels or stickers with your name or a special tagline. Personalized kits are perfect for birthdays, weddings, or corporate gifts, creating a memorable and thoughtful experience for the recipient.
Creating a DIY cookie kit is a fun and creative way to share the joy of cookie decorating with others. Whether it’s for a special occasion, a gift, or a family activity, these kits offer a delightful experience. By following the steps outlined in this guide, you can craft a kit that is both personalized and memorable. The combination of pre-baked cookies, royal icing, and decorations allows recipients to express their creativity while enjoying a tasty treat. With proper storage and handling, the kit remains fresh and ready for decorating. DIY cookie kits are a thoughtful and engaging way to bring people together, making them a perfect choice for any celebration or gathering. Get creative and enjoy the sweet rewards of your effort!
Leave a Reply
You must be logged in to post a comment.