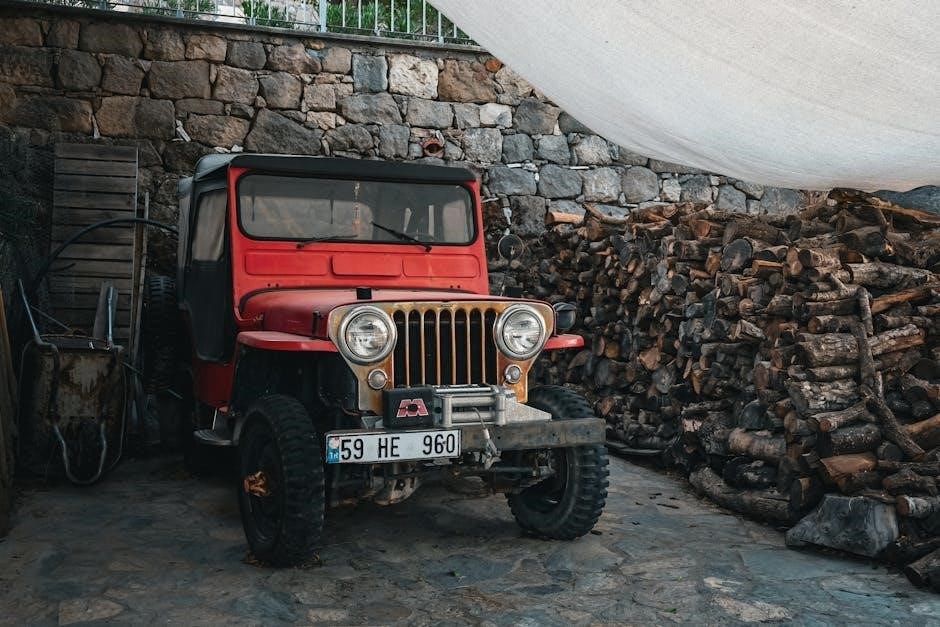
Jeep CJ5 Restoration Guide: A Comprehensive Plan
Embarking on a CJ5 restoration is a rewarding journey, demanding patience, skill, and a detailed plan for success․ This guide provides a roadmap!
The Jeep CJ5, produced from 1957 to 1983, holds a significant place in automotive history․ It evolved from its wartime predecessors, becoming a civilian favorite known for its rugged simplicity and off-road capability․
This model bridged the gap between utilitarian workhorse and recreational vehicle, appealing to a broad audience․ Restoring a CJ5 isn’t just about fixing a vehicle; it’s about preserving a piece of Americana, a testament to durable design and adventurous spirit․
Assessing the Project – Initial Evaluation
Before wrenching, a thorough evaluation is crucial․ Honestly assess the CJ5’s condition – is it a simple refresh or a full-scale rebuild? Document everything with photos and notes․
Prioritize safety; a structurally compromised frame demands immediate attention․ Consider your skill level and available resources․ This initial assessment dictates the project’s scope, budget, and timeline, preventing costly surprises down the road․
Rust Assessment: Severity and Location
Rust is the CJ5’s biggest enemy․ Systematically inspect the frame, body panels, floorboards, and rocker panels․ Use a screwdriver to probe suspect areas – solid metal versus crumbling rust․
Categorize rust: surface, penetrating, or severe․ Document locations with photos․ Pay close attention to areas prone to water collection․ This detailed assessment informs repair strategies, from patching to complete panel replacement, and impacts overall cost․
Mechanical Condition: Engine, Transmission, Transfer Case
Evaluate the drivetrain’s functionality․ Does the engine turn over? Compression test results are crucial․ Inspect the transmission and transfer case for leaks and smooth shifting․
Check fluid conditions – metallic flakes indicate internal wear․ Assess the overall condition of the engine mounts, driveshafts, and axles․ Determine if rebuild, repair, or replacement is the most cost-effective path forward for each component․
Missing Parts Inventory & Sourcing Challenges
Creating a detailed list of missing parts is essential․ CJ5 parts availability varies greatly; some are readily available, while others require extensive searching․
Expect to utilize online forums, specialized Jeep parts suppliers, and swap meets․ NOS (New Old Stock) parts command a premium․ Be prepared for potential fabrication if original parts are unobtainable, impacting both budget and timeline․
Disassembly: The Foundation of Restoration
Thorough disassembly is paramount for a successful CJ5 restoration․ Begin by documenting the vehicle’s current state with photographs․ Carefully remove components, avoiding unnecessary damage․
A systematic approach prevents lost parts and confusion․ Prioritize removing the body from the frame, allowing for detailed frame inspection․ This stage reveals hidden rust and damage, informing the restoration plan․
Body Removal & Frame Inspection
Safely lifting the CJ5 body from the frame is critical․ Utilize appropriate equipment – an engine hoist is recommended – and secure lifting points․ Once separated, meticulously inspect the frame for rust, cracks, and previous repairs․
Pay close attention to critical areas like spring perches, crossmembers, and body mounts․ Document all damage with photos․ This inspection dictates the extent of frame repair needed, ensuring a solid foundation․
Component Tagging & Organization
As parts are removed during disassembly, meticulous tagging and organization are paramount․ Use zip-lock bags, labels, and a detailed spreadsheet to track every nut, bolt, and component․ Photograph each step for reference during reassembly․
Group similar parts together – brake components, steering parts, etc․ – and store them safely․ This prevents lost parts and simplifies the rebuild process, saving significant time and frustration later on․

Frame Restoration: Ensuring Structural Integrity
The frame is the CJ5’s backbone; its integrity is non-negotiable․ Thorough inspection reveals rust, bends, and previous repairs․ Address any structural weaknesses before proceeding․ This often involves cutting out damaged sections and welding in new steel, ensuring factory specifications are met․
Proper welding technique and reinforcement are crucial for a safe and durable frame․ Prioritize safety and structural soundness above all else during this critical phase․
Frame Repair: Welding & Metal Fabrication
Effective frame repair demands proficient welding skills and appropriate equipment․ MIG welding is common, but TIG offers superior strength for critical areas․ Precise cutting and fitting of replacement steel sections are essential for a seamless repair․
Consider boxing the frame for increased rigidity, especially if significant rust was present․ Reinforce repaired areas with gussets and ensure all welds are thoroughly inspected for quality and penetration․
Frame Coating: Rust Prevention & Protection
Protecting the restored frame is paramount; rust prevention is key to longevity․ Thoroughly clean the frame, removing all traces of rust and mill scale․ Epoxy primer provides an excellent base, followed by a durable topcoat like polyurethane or powder coating․
Internal frame rails should receive a rust converter and preventative coating․ Consider applying a rubberized undercoating for added protection against road debris and moisture․
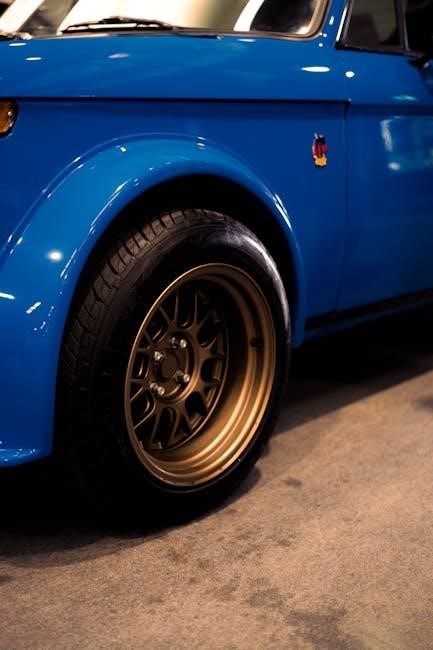
Bodywork: Repairing and Rebuilding the Shell
CJ5 bodywork often requires significant effort, addressing rust and damage accumulated over decades․ Begin by stripping the body to bare metal, meticulously assessing the extent of corrosion․ Patch panels are frequently needed for floors, rockers, and quarter panels․
Prioritize proper metal fitment and welding techniques to maintain structural integrity․ Ensure all repairs align with factory specifications for a true restoration․
Panel Replacement & Fabrication
Sourcing replacement panels for a CJ5 can be challenging; aftermarket options and careful fabrication are often necessary․ Floor pans, rocker panels, and lower quarter panels are commonly replaced․ When welding, prioritize proper fitment and use appropriate techniques like seam welding․
For unavailable parts, skilled metal fabrication becomes crucial, replicating original contours and ensuring structural soundness․
Metal Shaping & Welding Techniques
Restoring a CJ5 body demands proficiency in metal shaping and welding․ Techniques like hammering, shrinking, stretching, and using an English wheel are vital for repairing damaged panels․ MIG welding is common for its ease, but TIG offers cleaner results for visible areas․
Proper preparation, including grinding and cleaning, is essential for strong, lasting welds․ Practice is key!
Drivetrain Restoration: Heart of the CJ5
The drivetrain – engine, transmission, and transfer case – defines the CJ5’s capability․ A thorough inspection reveals the extent of work needed․ Options range from a complete rebuild, utilizing kits and professional machining, to sourcing a reliable replacement unit․
Consider your budget and desired power level when making these crucial decisions․
Engine Rebuild or Replacement Options
Deciding between rebuilding the original engine or opting for a replacement is pivotal․ Rebuilding offers authenticity but demands expertise and potential parts sourcing challenges․ A crate engine provides reliability and modern performance, albeit at a higher cost;
Evaluate engine block integrity, crankshaft condition, and cylinder wear to inform your choice; consider a V6 swap for increased power!
Transmission & Transfer Case Overhaul
A smooth drivetrain relies on a properly functioning transmission and transfer case․ Complete disassembly is crucial, inspecting gears for wear, checking bearings, and replacing seals․ Consider a professional rebuild if you lack experience․
Pay close attention to the transfer case’s chain and gears; synchronization is key for optimal four-wheel-drive performance․ Don’t overlook the shift linkages!
Suspension & Steering: Ride Quality & Control
Restoring the suspension and steering dramatically improves handling and comfort․ Begin by thoroughly inspecting all components – springs, shocks, leaf spring bushings, and steering linkages – for wear or damage․
Replacing worn bushings is essential․ Consider upgrading to modern components for enhanced performance․ A steering box rebuild or replacement may be necessary for precise control and safety․
Bushing Replacement & Component Refresh
Worn bushings contribute significantly to sloppy handling and a harsh ride․ Replacing all rubber bushings – in the springs, shackles, and steering linkages – is crucial․ Polyurethane bushings offer increased durability and performance, though they transmit more road feel․
Don’t forget to refresh shock absorbers and inspect U-bolts for corrosion․ Properly torqued hardware is vital for safety and longevity after component replacement․
Steering System Inspection & Repair
A safe and responsive steering system is paramount․ Thoroughly inspect the steering box for play and leaks; rebuild or replace as needed․ Check tie rod ends, drag link, and ball joints for wear, replacing any worn components․ Inspect and lubricate the steering column U-joints․
Ensure proper alignment after any steering component replacement for optimal handling and tire wear․
Electrical System: Wiring & Components
The CJ5’s electrical system often suffers from age-related issues․ Carefully assess the entire wiring harness for brittle insulation, corrosion, and damage․ Replacement with a new harness is often recommended for reliability․ Test all components – lights, gauges, starter, and accessories – ensuring proper function․
Consider upgrading to modern fuses and relays for enhanced safety and performance․
Wiring Harness Replacement or Repair
Deciding between repair and replacement hinges on the harness’s condition․ Extensive cracking or corrosion necessitates a full replacement; reproduction harnesses are readily available․ If damage is localized, careful splicing and heat-shrinking can repair sections․
Thoroughly label each wire before disassembly to simplify reconnection․ Use a wiring diagram as your guide, ensuring correct connections for safe operation․

Component Testing & Upgrade Options
After wiring is sorted, meticulously test each electrical component: lights, gauges, starter, and accessories․ A multimeter is invaluable for diagnosing issues․ Consider upgrades like modern LED lighting for improved visibility and reliability․
Adding an aftermarket fuse block enhances safety, and electronic ignition systems offer performance gains․ Prioritize safety and functionality during upgrades!
Brakes & Fuel System: Safety First

Prioritize safety by thoroughly inspecting and rebuilding the brake and fuel systems․ Replace all brake lines with new, DOT-approved components and meticulously bleed the system to eliminate air․ Inspect the fuel tank for rust and leaks, replacing it if necessary․
New fuel lines and a fuel filter are crucial․ A failing brake or fuel system is a serious hazard!
Brake Line Replacement & System Bleeding
Replacing brake lines is paramount for safety; use pre-flared lines for ease of installation, ensuring proper fit and secure connections․ After installation, bleeding the brake system is critical to remove air bubbles․
Start with the wheel furthest from the master cylinder, pumping the brakes until firm resistance is felt․ Repeat at each wheel, verifying a solid pedal!
Fuel Tank & Line Inspection/Replacement
A thorough inspection of the fuel tank for rust, leaks, and damage is essential; replacement is often recommended due to age and potential corrosion․ Carefully examine all fuel lines for cracks, deterioration, or blockage․
Replace any suspect lines with new, fuel-grade hose․ Ensure all connections are secure and properly clamped to prevent fuel leaks, a serious safety hazard!
Interior Restoration: Comfort & Style
Reviving the CJ5’s interior brings back its original charm and enhances driving enjoyment․ Begin with seat upholstery – repair or replace worn coverings, choosing materials that match the original style or offer a personalized touch․
Next, focus on the dashboard and gauges; restore faded plastics and ensure all instruments function correctly․ New carpets and door panels complete the comfortable, stylish interior․
Seat Upholstery & Replacement
CJ5 seats often show significant wear, making upholstery or replacement a priority․ Carefully remove the existing material, inspecting the foam for damage and replacing it if necessary․ When reupholstering, choose vinyl or fabric closely matching the original pattern and color․
For severely damaged seats, consider complete replacements, readily available from restoration suppliers․ Ensure proper fit and secure mounting for safety and comfort․
Dashboard & Gauge Restoration
The CJ5 dashboard often suffers from cracking and fading due to sun exposure․ Careful cleaning and application of vinyl repair compounds can address minor damage․ For extensive cracks, consider a dashboard overlay or complete replacement․
Gauge restoration involves disassembly, cleaning, and often, replacing worn internal components․ Test each gauge thoroughly after reassembly to ensure accurate readings, enhancing both function and aesthetics․
Exterior Restoration: Paint & Trim
Achieving a show-quality finish requires meticulous body preparation․ This includes stripping old paint, addressing rust repairs, and applying body filler for imperfections․ Proper sanding is crucial for a smooth surface․
Selecting the correct paint type – enamel, acrylic lacquer, or modern basecoat/clearcoat – impacts durability and appearance․ Reinstalling trim pieces, emblems, and bumpers completes the exterior, restoring the CJ5’s iconic look․

Body Preparation for Paint
Thorough preparation is paramount for a lasting paint job․ Begin by stripping the body to bare metal, removing all traces of old paint, rust, and contaminants․ Address any remaining imperfections with body filler, carefully shaping and sanding for a seamless finish․
Multiple layers of primer are essential, followed by wet sanding to create a perfectly smooth surface ready to accept the final color coat․ Masking protects areas from overspray․
Paint Application & Clear Coat
Applying the paint requires a clean, well-ventilated environment․ Several thin coats are preferable to one thick coat, preventing runs and ensuring even coverage․ Allow each coat to tack up before applying the next, following the paint manufacturer’s recommendations․
Once the color coat is dry, apply multiple layers of clear coat for protection and gloss․ Wet sanding and polishing refine the finish, revealing a showroom-quality shine․
Final Assembly: Bringing it All Together
With components restored, final assembly is a meticulous process․ Begin with the drivetrain, carefully installing the engine, transmission, and transfer case․ Next, attach the body to the frame, ensuring proper alignment․ Gradually add interior parts, wiring harnesses, and exterior trim․
Double-check all connections and fasteners, referencing photos taken during disassembly․ Patience is key to a successful reassembly!
Testing & Adjustments: Ensuring Proper Function
Post-assembly, thorough testing is crucial․ Start with a careful inspection of all systems – brakes, steering, lights, and fluids․ Perform a low-speed test drive, listening for unusual noises and monitoring gauges․ Adjust the carburetor, timing, and brakes as needed․
Address any issues promptly to guarantee safety and optimal performance․ A well-adjusted CJ5 is a joy to drive!
Sourcing Parts: Where to Find What You Need
Finding CJ5 parts requires diligence․ Online retailers like Quadratec and Jeep Parts USA offer extensive catalogs․ Local auto parts stores can supply some common items․ Jeep-specific forums and clubs often have classifieds sections for used or NOS (New Old Stock) parts․
Don’t overlook salvage yards – a potential goldmine! Patience and research are key to locating the correct components․
Budgeting & Time Management: Realistic Expectations
Restoration costs can quickly escalate․ Create a detailed budget, including parts, tools, and potential professional labor․ Add a 20-30% contingency for unexpected expenses․ Time estimates are equally crucial; a full restoration easily takes 12-24 months, or longer, depending on skill level and scope;
Prioritize tasks and be prepared for delays – patience is vital!
Common Restoration Challenges & Solutions
Rust repair is often the biggest hurdle; thorough metal fabrication skills or professional welding are essential․ Sourcing rare parts can be difficult – utilize online forums and Jeep communities․ Electrical gremlins are common; invest in a quality wiring harness․
Don’t hesitate to seek expert advice when facing complex issues!
Resources & Further Information: Clubs & Websites
For dedicated support, join the CJ5 Restoration Forum (cj5forum․com) and the Jeep Owners Club (jeepclubusa․com)․ These communities offer invaluable advice and parts sourcing assistance․ Explore Kaiser Willys Auto Parts (kwautoparts․com) for a vast selection of components․
Don’t forget to check out Jeepology (jeepology․com) for detailed technical articles!
Leave a Reply
You must be logged in to post a comment.